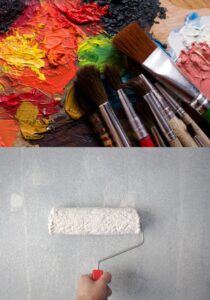
Is your RV looking a bit tired and not so stylish? Want to give it a fresh vibe without spending a ton of cash? You’re in the right spot! Sprucing up the outside of your RV can be a fun DIY adventure. Let’s jump into the basics of painting your RV, and I’ll guide you through the steps, tips, and tricks to help your RV shine like never before!
Why Paint Your RV?
Painting your RV isn’t just about making it look nice; it’s also about taking care of your investment! A good paint job protects against harsh weather, UV rays, and rust. Plus, a fresh coat can boost the resale value of your RV. So, why not treat it to a little upgrade?
Choosing the Right Paint
What Kind of Paint Should You Use?
When it comes to painting your RV, you can’t just grab any old paint! Go for high-quality, durable paint specifically made for exteriors. Acrylic latex or urethane-based paints are solid choices. They stick well and flex a bit, so your paint job will last a long time.
Picking a Color
Let’s chat about color! Here’s where you can really let your true self shine. Do you want something loud and fun, or do you prefer a classic, chill vibe? Think about what colors reflect your personality and adventures. A bright shade can really pop at a campground, while classic white or beige has that timeless charm.
Getting Your RV Ready for Painting
Cleaning is Important
Before you grab that paintbrush, you need to prep your RV. Start with a big clean-up. Use a good degreaser and scrub off all the dirt, grease, or gunk. This step is super important because paint doesn’t stick well to a dirty surface.
Sanding the Surface
Once your RV is nice and clean, it’s sanding time. This might sound a little scary, but trust me, it’s not! Sanding helps create a texture for the paint to grab onto. You can use a power sander or just regular sandpaper. And don’t forget to wear a mask to keep the dust away!
Painting Your RV
Tools You’ll Need
Before you start painting, grab your tools. You’ll want:
– High-quality paint
– A paint sprayer or rollers
– Brushes for any touch-ups
– Masking tape
– Drop cloths
– Safety goggles
The Painting Steps
1. **Masking**: Start by covering up areas you don’t want to paint, like windows and trim. This helps you get nice clean lines.
2. **Prime the Surface**: If your RV has old paint or spots that aren’t smooth, it’s a good idea to use a primer. This helps the new paint stick better and look even.
3. **Start Painting**: Here’s the fun part! If you have a sprayer, it’ll give you a smooth finish; a roller gives you better control. Apply thin coats and let each one dry fully before adding another.
4. **Final Touch-Ups**: Once you’ve got the color you want, go over any spots that need a little extra love with a brush.
Aftercare
Sealing Your Paint Job
Once your paint’s all dry, think about putting on a clear sealant. This adds extra protection against sun damage and bad weather.
Regular Maintenance
Keep your RV looking fresh by washing it regularly and checking the paint for any chips or wear. A little care goes a long way!
Anecdote Time
Here’s a fun little story! A buddy of mine decided to paint his RV bright orange. I was a bit unsure at first, but it turned out fantastic! He got compliments everywhere and it sparked so many conversations. So, go ahead and be bold with your color choices!
Fun Facts About RVs
Did you know the first RV made its debut in 1910? It was called the “Touring Landau,” and it was essentially a horse-drawn wagon with a tent on top! Crazy how far we’ve come with RVs today!
Conclusion
And there you have it! Painting your RV can be an enjoyable project that turns your vehicle into a personal masterpiece. Just remember to pick the right paint, prep the surface well, and express your personality with your color choice. Happy painting!


Leave a Reply